Thursday, December 9, 2010

The Brain, Processing Speed, and Fluency

More amazing things I’m learning in the BrainSMART graduate program...

Reading is not a natural act for the brain.  In other words, there are no existing structures wired into the brain specifically for reading.  To read, the brain uses structures meant for other processes.  This is a complex task that takes years to perfect.  The brains of readers who seem to learn with relative ease have chosen a particular pathway in the brain that works best.  However, not all brains choose this route.  When that happens we see struggling readers.

The Good News

The good news is that the brain is “plastic,” or changeable throughout our entire lives.   With the proper interventions, a struggling reader can become proficient.  There are several strategies to help accomplish this, and I have already touched on some in this blog.  The issue I would like to address today is fluency and its connection to processing.

The Connection

Researchers have found that a random automated naming (RAN) is a good indicator of future reading success.  Students who can quickly and accurately name random symbols, colored shapes, or simple objects are more likely to be successful readers. “Researchers emphasize that when a child lacks skills for automatic naming, comprehension, and speed of word calling, reading suffers” (Nevills and Wolfe 2009).  There is a significant difference in reading ability in children who can look at a picture, identify it, determine it’s name, say the name, and move on quickly to the next object, and those children who have difficulty with the task.  Processing rate matters.

Why It Matters

Phonological processing is a component of the brain’s rate of processing.  Any student, who cannot quickly and accurately perform phonological processing, will not be able to read fluently. 

What Can Help

There are several effective ways to help a student become a more efficient processor, and thus a more fluent reader.  I will discuss three strategies here.
·      Frequent practice with object naming.
·      Oral reading that is: guided, repeated and modeled.
·      Independent silent reading.

Frequent Practice Naming Objects

Help increase processing speed through object naming practice.  Make charts with increasingly difficult sets of items to name.  For example, start with familiar objects, and then move on to letters, clusters, and words. Let the student practice with the first chart (Sample of a first chart). Set a timed goal for naming the objects, once the goal is met move on to the next chart. Each chart should be mastered more quickly than the one before.  This process primes the brain to “develop facilitated neural networks for rapid identification, naming, disengagement, and movement to the next object” (Nevills and Wolfe 2009). 

Oral Reading

Practice, practice, practice.  Studies have shown that struggling readers are less likely to achieve the gains of regular readers without extensive reading practice.  Oral reading to an adult or another student for 15 minutes, three days a week, will help poor readers in word identification, comprehension, and fluency.

Another practice strategy is rereading.  This can be done individually or whole class.  It should not take more than five minutes. To begin, the teacher reads a passage for one minute as students follow along in their own copy.  The passage can be fiction, nonfiction, poetry, etc.  Then students reread the passage silently for one minute.  Finally, students take turns rereading the passage with a reading partner.  This is repeated every day with the same passage, and then begins over with a new passage the next week. 

 Independent Reading

Every classroom should have a wide range of reading material available, at appropriate reading levels.  Beyond that, every student needs the opportunity to read independently every day.  Avoid the “drop everything and read” activity unless teacher direction and follow-up are included.  Make sure students are reading books appropriate for their reading level.  Engage student interest by selecting three or four students to share what they read at the end of the reading session.  This will ensure all students are reading for comprehension, and therefore benefiting from the activity.

Finally

If reading fluency is a predictor of future school success, and processing speed is a predictor of reading success, then teachers must make it a point to help students who are slow processors.  Processing and fluency instruction can occur simultaneously in the strategies mentioned above.  Object naming, rereading, and independent reading are just three examples.  The plasticity of the brain is an amazing thing; let’s make it work for our students. 


Nevills, P. and P. Wolfe (2009). Building the reading brain, preK-3. Thousand Oaks, Calif., Corwin Press.

Wednesday, December 1, 2010

A Brain-Friendly Comprehension Strategy

Sometimes, you just can’t appreciate the potential of a brain-friendly strategy until you try it.  Today, I tried the “Oprah Winfrey” interview to help students think more critically about a story we read.  I was honestly surprised at its effectiveness.

Setting Up

The Oprah Winfrey interview is used to increase comprehension and foster literate conversations.  Its effectiveness is phenomenal.  Today after reading a story, I set several chairs in a row in front of the class.  “Oprah” sits in the first chair (that is the teacher initially).  The characters to be interviewed sit in the other chairs.  Our story this week was Dear Juno.  Dear Juno is about a boy who gets a letter from his grandmother in Korea.  He figures out what the letter says by looking for clues in pictures.  For our interview, I needed a Juno, a mother and father, and a grandmother.  I asked for volunteers to represent characters in the story, reminding them they’d need to be “in character”. 

The Interview

Once we were all settled, I began by asking several general questions.  I asked my “Juno” how he knew the letter was to him, how he knew who the letter was from, and how he felt when he saw it.  Next, I asked the “grandmother” and “parents” several questions, ending with questions that required students to make inferences and draw conclusions.  Finally, I let the “audience” ask questions.  They were remarkably well thought out.  It was clear comprehension was increasing as students who had not been able to participate became fluent in the story.  They were highly engaged. The interview only lasted about five minutes.  It was a very effective five minutes.

Finally

This technique can be adjusted for any grade level. I highly recommend this brain-friendly strategy.  I plan on using it regularly in my classroom.

Tuesday, November 23, 2010

A Fun Way to Build Vocabulary

I have to share another fabulous technique I’ve learned in the brilliant BrainSMART program. This technique revolves around vocabulary building. 

Why Vocabulary Matters

Vocabulary is a skill that frequently does not get the attention it deserves.  However, its importance cannot be overstated.  As students learn, their brains are always looking for ways to tie new information to pre-existing knowledge.  In this way, the brain is able to chunk information into existing neural networks, thus making retention and retrieval more likely.  With this in mind, consider two students reading a new text.  The first student did not come from an enriched background, and has a limited vocabulary.  Even though his decoding ability is at an adequate level, he is not familiar with several of the words in his text.  His comprehension is therefore limited.  The next student was exposed to an enriched vocabulary from an early age.  As this student reads his new text, he is able to understand all the words.  When he comes across an unknown word, he is able to figure it out through context clues.  Decoding skills being equal, vocabulary made the difference.  The playing field needs to be leveled!

Level the Playing Field

A teacher can level the playing field through explicit vocabulary instruction.  This does NOT mean copying definitions from the dictionary!  Instead, one option is to try what I call Word Tallies.  I gave my second graders three new words last Monday:  peculiar, quaint, and stupendous.  After introducing the words and discussing meanings, I gave students the option of dramatizing the words (which is another strategy in itself).  One pair dramatized a phone conversation about something they found peculiar.  The next acted out a quaint tea party.  The last pair had a discussion about how stupendous their teacher is!  Finally, I put the words on the wall.  Every time someone in the classroom (even me) used one of the words, the word earned a tally mark.  Students could even earn tally marks by using the words at home (even other family members could add to the points).  I emailed parents to give them a heads up.  By the end of the second day ‘peculiar’ was used 40 times, ‘quaint’ was used 35, and ‘stupendous’ was used 45 times!  It was stupendous!  We kept our count with tally marks, and then moved the data to a chart to analyze our results. 

Finally

It was clear by the end of the second day that students had a firm grasp of the meaning of all three words.  Would they have gotten the same understanding by copying definitions from the dictionary?  I don’t think so.  The icing on the cake came in an email from an ESL parent.  She said her son came home and taught HER the words and definitions!  Wow.  The sprinkles on top of the icing… students were able to read the words.  This is now a weekly activity for my class.

I’m learning many other vocabulary building strategies as well.  This idea came from one of my BrainSMART class books, Classrooms That Work: They Can All Read and Write, by Cunningham & Allington.

Sunday, November 21, 2010

Strategy to Improve Attention Span

If you’ve followed me for long, you know I love to blog about things I’m learning in the BrainSMART Masters degree program.  I’ve recently discovered something new and phenomenal!  I came across it in a book used by the BrainSMART program called, Building the Reading Brain, by Nevills and Wolfe (2009). It’s a strategy to help students extend their concentration and attention span. 

Working Memory

Many students who have reading problems have difficulty keeping names of objects or words in working memory.  All information must be processed through working memory before being passed on for possible long-term retention.  When reading, words are held in working memory long enough for an individual to comprehend the words they are reading.  Too often, students with reading difficulties are unable to maintain words in working memory as they struggle to sound out new words in a sentence. Therefore, comprehension is impossible.  Children who have this difficulty can be remediated with the strategy I’m going to share with you.  In fact, all students can improve their concentration.

Wait to Respond Strategy

The strategy utilizes “wait to respond” time.  Therefore, students must maintain and rehearse information in their working memories until it is time to share with their partners.  For example, tell students to think of 3 words that begin with the letter ‘m’.  Remind them not to share the words before instructed to do so.  When you give the signal, students share the remembered words with their partners.  As student concentration improves, increase the time or add to the task by asking for words that end with the same sound (3 words that end like ‘tire’). 

Add Complexity

Initially, exercises require a verbal response.  Written responses, “demand additional brain resources, including the motor cortex, and add to the complexity of the task” (Nevills and Wolfe, 2009, p. 80).  Therefore, when students are easily completing the tasks above, move to activities with written responses rather than verbal.  For example, give students three related words (walk, run, skip), instruct them to hold the words in their minds until told to write them down in the same order you gave them.  Eventually move on to unrelated words for more complexity.

Helpful Insights

When working with students with significant reading delays, I recommend working one on one until they begin to show some progress.  Begin by giving them three words to remember.  If this is too difficult, move down to two or one words as appropriate.  When asking these students to think of words, have them give you a signal when they have chosen their words (I ask them to lift a finger).  Wait a moment then ask for their words.  If you notice your student hesitating and searching the room for ideas… they’ve forgotten their words.  In this case, reduce the number of words and/or the wait time. 

Finally

I am excited about using this strategy with my students.  I have also shared it with parents who make a game out of the activity at home or in the car.  Our brains are trainable just like our bodies.  Let’s exercise those brains for optimal results!

Friday, November 19, 2010

Student Created Readers Theater

I’m trying to create more brain-friendly lessons based on what I am learning in my BrainSMART classes.   One point of research suggests that students do much better when their subjects are integrated as much as possible.   That gave me another bright idea…

My Idea

We are in the midst of a unit about Sequoyah and the Trail of Tears.   My idea was to blend our unit with writing, fluency, and vocabulary.   Thus my students embarked on a reader’s theater learning adventure combining their knowledge of Sequoyah or the Trail of Tears, with their writing and vocabulary skills. 

The Collaboration

My classroom is set up to encourage collaborative work.  Therefore, each table group became a reader’s theater group.  Students decided as a group whether to focus on Sequoyah or the Trail of Tears.  We reviewed what they had learned so far about each subject.  I wrote their comments on the smartboard for reference.  Finally, they began writing.  I had each group write their script on a single piece of paper, with the student who would read each part actually writing down what they would say.  At the end I made copies for each person in the group. That way I hoped to avoid ‘handwriting confusion.’

The adventure then began.  I gave them a relatively free reign just to see what they could accomplish.  It was interesting watching the groups work together to solve problems and make decisions.  One group immediately began mining books for more information to reference in their script.  Two other groups began by writing out a cast of characters and deciding who would play each part.  A fourth group began arguing about which subject to choose, then about who would play each part.

Ready to Perform!

Our script writing took two class periods. I was incredibly proud of how well the groups worked together to solve problems, integrate knowledge, and collaboratively write their scripts.  I just couldn’t wait to see the final products!  Soon my enthusiastic young writers were rehearsed and ready.  I videotaped their first performances so they could critique themselves and add to or delete from their scripts.  They were thrilled and motivated to see themselves on the smartboard! 

We invited our school principal in to enjoy the final fruits of their labor.  He gamely attended the afternoon performance and applauded each group.  Even though not every fact was correct, they did a fantastic job.  As usual I was humbled by what my second grade students can accomplish… and VERY proud of them.  I’m looking forward to our next student created reader’s theater!

Finally

Student created reader’s theater is beneficial because each student writes his or her own part; therefore it’s not too far above any given student’s reading level.  Each play is multi-level by default.  Specify what vocabulary or spelling words you would like to see included in each play, this way students get ‘real life’ practice with the words.  Decide on a writing skill you would like to see reflected in their work.  Capitalization?  Punctuation?  Complete sentences?  The list can be as long or as short as you want.  A word of caution…don’t put too many restrictions or it will detract from their creativity.   When you give this a try, keep in mind that it will get better each time your students participate.  Open the creativity gates and integrate those subjects at the same time!

Enhanced by Zemanta

Saturday, November 6, 2010

Learning to Teach to the Brain

I mentioned to someone that I’m getting my Masters in Brain Based Teaching.  The response was, “Isn’t all teaching brain based?”  I used to think so also.  I’m now in my second course of the BrainSMART program (available through Nova Southeastern University).  I am learning extremely valuable information.  Knowledge that is transforming my teaching!  I’ve learned that the teaching style employed by thousands is in fact, NOT brain based.  Which is undoubtedly why our educational system is in such a questionable state.

My first BrainSMART course began with an overview of the important body-brain system, how to take care of it, and then delved into research about how the brain learns best.  The BrainSMART model was broken down into its individual components and studied.  We then learned specific strategies for utilizing each component of the SMART model.  From that first class, I was able to write my blog post Transforming Teaching.  If you haven’t read that, I recommend checking it out as it shows my before and after teaching strategies.

My current course is getting even deeper into how the brain learns, what exactly has to happen in the brain for learning to occur, what research shows are brain-friendly teaching strategies and interventions to achieve that learning, and why.  What I like about this class is that I’m learning even more of the WHY behind the strategies.  It’s utterly fascinating. 

Once example is mirror neurons.  Through the use of mirror neurons, children grow a powerful system of connections in their brains by simply watching what adults do.  According to Nevills and Wolfe in Building the Reading Brain, “This amazing system allows children to activate a neural set of connections as if they were actually doing what is being watched.”  In other words, children can grow neural connections as if they were reading by simply watching and listening to someone read!  This is yet another confirmation of the importance of reading to children.  Additionally, this reinforces the practice of modeling desired behavior in class.

Nevills and Wolfe also say, “One of the human brain’s most amazing capacities it its ability to sculpt itself based on what it experiences.”  This concept of neuroplasticity is amazing!  Students are not just products of their environment.  Brains can be ‘exercised’ and reworked to learn new and complex material.  That’s exciting!  We aren’t slaves to our DNA.  The important thing is to teach the way the brain learns.  It seems obvious, doesn’t it?  Yet so many teachers still only teach through lecture… and research proves students only retain 5% of a lecture.  Our kids deserve better than that.

Our educational system in much of the country is in trouble.  Each one of us can make a difference.  If you are thinking about a Masters Degree, or just want to learn to be a more effective teacher, I can assure you that BrainSMART is the way to go.  We can transform our educational system… BrainSMART is one tool, which I believe can do just that.  
Enhanced by Zemanta

Saturday, October 30, 2010

Using Contracts to Extend Learning

A leader teach is able to help this student wi...Image via Wikipedia
It happens in every classroom.  You are happily engaging the classroom in a lesson when you notice a bored face with a glazed expression staring back at you. Or worse, rather than a glazed expression the student may be causing havoc in order to entertain him or herself.  This is the student who already knows the material.  You have two options: create a stressful situation by forcing the student to stay on task, or enrich your student.

Option One

I realize that many teachers select the first option.  After all, it seems easier to have all students doing the very same thing at the very same time, and there are times when that structure is necessary.  There are also many more times when such a structure is not necessary.  Some students already know the material being taught, and yet some teachers are quite good at forcing those very children into submission and then droning out a lecture anyway.  A question that must be asked however is, ‘is that the best way to facilitate meaningful student learning?’  We don’t teach to make our lives easier, we teach so students will learn!   

An Alternative: The Contract

How do we know if the student with the glazed expression, or the one wreaking havoc, is indeed in possession of the knowledge we seek to impart?  One way is to use the pre-test.  Give a version of the end of chapter test before beginning the chapter.  Make sure there is more than one question per concept, AND that it is NOT multiple choice.  (Take it from me… there are good guessers out there.  I found that out the hard way.) I tell students what the chapter will be about, and leave the choice to take the pretest up to them.  

If students pass the pretest, they sign a learning contract.  The criteria for passing the pretest are up to you.  I usually allow a student to pass if they miss only one concept.  On the day that specific concept is taught, the student must work with the rest of the class.   This information is presented in the student contract.  Below is a section of one such contract.


As you can see, each concept is listed with its corresponding page numbers.  If the student missed a concept on the pretest, that concept will be checked and the student will work with the class on that day.

Pre-tests are not always necessary.  In my class, gifted students are given the option to sign a contract for Language Arts each week.  I give them a folder containing the contract and class work for the week, which they complete at their own pace.  Once finished correctly they can move on to the Extension Options.  I do require pre-tests for math.

Extension Options

The extension options are to let students know what they should do while the rest of the class is plugging away.   Here is the section of my contract that covers this:


If your math or reading series comes with enrichment work, put these together in a folder for your student (the folder should also contain the contract).  I require the enrichment packet be completed fully and correctly before allowing my student to move on to the extension options. 

Discuss the extension options and working conditions prior to asking a student to sign the contract.  They LOVE to sign!  I let them know it is especially important not to disturb me during instructional time, and that they will lose their privilege to be on the contract for the rest of the day if they do.  One will always try.  I’ll be up there teaching away when one of my ‘contract students’ will walk right up to me to ask a question.  I quietly tell them they’ve lost their privilege to be on the contract for that day – because they broke the contract – and they must work with the rest of the class the remainder of that day.  They learn a real life lesson, and it usually won’t happen again.  That also goes with the other working conditions.  I explain the conditions are there for a reason and if they break their contract, their privilege is lost for the day.

Products

So far this year I’ve had a wonderful PowerPoint presentation about the history of our town, and an illustrated book about ants.  Both created by 2nd grade students!  The presentations usually have something to do with a subject we are studying.

Accountability
Make sure to include a form in each student folder for them to record what they have done with their time.  What books did they reference in the library?  What website did they access for research?  What did they read?  At the end of the week, I staple the contract with their weekly work, pre-test, and the accountability form to send home.

Finally

Here is a copy of a blank contract for you to make into your own.  I adapted this idea from the book Teaching Gifted Kids in the Regular Classroom by Susan Winebrenner, 2001.

Learning contracts will help classroom management because you will not have to deal with bored students.  More importantly, student needs will met.  Is it a little more work?  Yes.  Is it worth it?  Yes.  Your bored, eyes glazed over student will thank you.  Your student wreaking havoc to stay entertained will also thank you because he/she will no longer be getting into trouble.  You will breathe a sigh of relief.

Learning Contract pdf file.
Enhanced by Zemanta

Monday, October 25, 2010

A Brain-Based Resource for Parents to Help Their Kids Learn!

 Parental involvement is a strong predictor of student success.  Metacognition is crucial to student success. Marcus Conyers and Donna Wilson bring the two together in their book BrainSMART In The House: The Family Guide to Helping Children Succeed in School and in Life.

The book is broken down into three easy to understand sections.  According to the introduction, “The first section, titled Thinking, includes ideas for coaching your children to become successful and seven essential tools for thinking.  Section 2 is titled Learning and includes 20 tools from the popular BrainSMART Model.  Section 3 is titled Communication and explains our Barcode for the Brain model as a powerful communication tool.”

I’m excited about this book because it takes the brain-based metacognitive tools we use in the classroom, and extends it to the home.  Now I have another fantastic tool to share with parents!

Saturday, October 23, 2010

Tutorial for the Everyday Math Teachers Assessment Assistant CD


If your district recently adopted Everyday Math, you’re a couple months into the school year now and perhaps beginning to get into the swing of things.  You may have wondered about the Teachers Assessment Assistant CD that has been gamely peeking at you from your Teachers kit.  Perhaps you’ve even popped it into the computer for a look-see, then immediately tucked it away again discreetly promising yourself to look again when you have more time.  Time… what’s that?

I’ve gone back and forth about whether to post a tutorial for the CD.  After much hemming, hawing, requests from teachers, and procrastination, I’ve finally decided to do it.  So here goes…

The aforementioned CD comes with the Everyday Math Teacher’s Kit.  For installation, simply follow the directions inside the CD cover.  Username and password are both admin.  I get the most questions about the worksheet builder; therefore I’m going to focus on that in this post.

After signing in, select Worksheet Building on the home screen (figure 1). 

                                           Figure 1


On the next screen you will have the option of selecting questions for your worksheet by goal or by unit. Click the boxes at the left of those options to see more (see figure 2).

                                          Figure 2


In figure 3 you can see the selections available under goals and units.  For my example, I’m going to use the unit section.

                                           Figure 3


Select the box beside the desired unit.  After clicking the box, three options appear: oral assessment, written assessment, and open response (figure 4).  Again, select the box beside the option you want. 

                                           Figure 4


In figure 4, I selected written assessment.  A list of objectives appears.  As you can see in figure 5, there are only numbers of objectives listed… no descriptions.

                                     Figure 5


I am unable to find corresponding numbers in the Teachers Lesson Guide.  The numbers might be there; but your friendly neighborhood blogger here can’t find them.  Fortunately there are fantastic (not to mention preferable) ways around it.  One way is to double click an objective.  I’ll double click the first one labeled [2.3.2.54].  The popup in figure 6 will appear.

                                        Figure 6


If you decide to add this question to your worksheet, select the Add button. To make a new question on the SAME objective, select the New Values button. Select Add to add the question to your worksheet.  Do not select Save until you are finished adding questions.

To see the problems for the next or previous objective, select the arrows at the bottom of the window. 
When you have finished choosing the problems for your worksheet, select the Save button. 
You will now see the objectives you selected in the New Worksheet window (figure 7).

                                          Figure 7


Another option to view questions within an objective is to single click the objective you want to see, and then click the button with eyeglasses (see figure 8) on the toolbar.  This will work on either side of the active window shown below.  The New Worksheet side will show ALL the math problems already on your worksheet.  To create a different or new math question within an objective, select the dice button on the toolbar (figure 8).

The left side window will only show an individual math problem for a selected objective unless you select the entire chapter.  To select the chapter, select Written Assessment (circled in figure 8) and then click the eyeglass button.  The math problems will appear below each objective.  (Note: you have to de-select the eyeglass button to make the questions disappear again.) To change a problem within an objective, select the dice button on the toolbar (next to the eyeglass button).  On this screen you can also drag an objective from the left window into the worksheet window.

                                           Figure 8


The last option to create a worksheet is to use the Worksheet Wizard.  However, as far as I can tell you cannot easily choose your own math problems with this option.  However, I do recommend playing around with it as it may suit your needs.  Should you choose to use it, select the button on the toolbar with a lightning bolt and follow prompts.

Finally, save the worksheet by selecting the save button or select file/save.  A window will appear giving you the opportunity to name and save the worksheet.  Now the worksheet will be available from the dropdown box at the top of the worksheet window.  You are able to print at any point. 

There are other options available, however I just wanted to cover the worksheet basics for now.  I hope this is will help you get started!

Thursday, October 21, 2010

Transforming Teaching

I’m working on my lesson plans for next week.  I can no longer plan without all the knowledge I’m gaining from the BrainSMART program vying for attention in my mind.  This program is truly revolutionizing my teaching experience, and by extension, the experiences of my students.  If you’ve been following my blog, you’ve been witnessing the change in progress.  I’m having FUN teaching!

The Change

I have to admit it.  In previous years I have been a slave to the curriculum.  If the curriculum book said to have students do page 56 in the practice book on Tuesday… then we did page 56 in the practice book on Tuesday!  I did small groups when I could.  I also tried to target learning styles when possible.  In retrospect though it was like having a map showing only main streets, and being asked to find a specific location on a side street.  I had the overall knowledge of how to teach, but not the specifics to make the learning ‘stick.’  Now, I look at the overall objectives for the week, and then I think about how to use the BrainSMART strategies.

 New Style

Did you know that after 24 hours, students only retain 5% of a lecture?  Having students read only brings retention up to 10%.  How do most teachers teach?  Lecture.  Therefore, in my planning I’m thinking of different BrainSMART ways to present information AND how to make cross-curricular connections.  For example, Monday we are beginning a unit about Sequoyah and the Trail of Tears.  In spelling we’ll learn r-controlled vowels.  The writing trait will be organization and paragraphs.  In math we will use geoboards.

The Plan

I think it might be beneficial to show the changes in teaching strategy, so I’ll provide a synopsis of what I did before my first BrainSMART course, and what I’ll do now.  I’ve only had one course so far!

Before my first BrainSMART course:

Monday Morning:

·       Restroom breaks, water bottles, pencil sharpening.
·       Introduce r-controlled vowels.  Write words on smartboard and have students change the meaning of each word by changing a single letter.
·       Practice book page 73
·       Spelling pages 29, 30
·       Decodable Reader
·       Restroom Breaks
·       Talk about sequence.  Read a story and discuss keywords to identify sequence.
·       Practice page 74

After my first BrainSMART course:

Monday Morning:

·       Restroom breaks, water bottles, pencil sharpening.
·       Introduce r-controlled vowels.
·       Have students work in groups to see how many words they can come up with containing r-controlled vowels.  Discuss the words as a class.
·       Have students do spelling page 29.  Make sure they use a different color when writing the target sound in a word.
·       Invite students to floor.
·       Introduce Sequoyah and his creation of a syllabary through the use of dramatic storytelling.
·       Think/Pair/Share periodically.
·       Ask students to retell the sequence of events.  Point out sequencing words.
·       Return to desks
·       Ask students write syllabary-like symbols they might create to represent r-controlled vowels.  Write words using the symbol in place of the r-controlled vowel. Ask them to share their ideas with the class. 

Monday Afternoon

·       Storytime
·       Restroom Break
·       Math
·       Students use slates to show 3 ways to represent the number 36.
·       Students group and use playing cards to build numbers.  Show different ways to represent each number.  Record answers.
·       Talk about geoboards and shapes.  Have students use boards and rubber bands to make shapes.
·       Restroom Break
·       Introduce Sequoyah
·       Show on map where he was from & talk about his family.
·       Introduce weaving activity to students.
·       Students copy a pre-printed summary of Sequoyah.

Monday Afternoon

·       Storytime
·       Restroom Break
·       Math
·       Students use slates to show 3 ways to represent the number 36.
·       Ask students how this is the same or different from what Sequoyah did with the syllabary.  Transition to groups.
·       Students group and use playing cards to build numbers.  Show different ways to represent each number.  Record answers.
·       Introduce geoboards.  Students work in pairs and try to duplicate shapes.  Show a map of where Sequoyah was born.  Ask students to recreate the shape on their geoboards.
·       Restroom Break
·       Ask students to share what they remember about Sequoyah.
·       Write their memories on the smartboard, then ask them to sequence the thoughts listed. 
·       Use students to represent each ‘thought.’  Have the rest of the class decide if the ‘thoughts’ should stand together or need their own paragraphs.
·       Have students choose a comfortable spot in the classroom and write 2 paragraphs based on their choice of the information they provided.  
·       Introduce the Sequoyah unit’s weaving project.  Ask students if/how weaving is similar to geoboards.
         Let students spend time weaving.

Summary

Obviously I could not include every detail or transition, but I think this gives a nice basic overview.  I’m excited to give this a try Monday and see how students respond.  I’ll let you know.  I am thrilled to experience this transformation in my classroom.  I feel like I’m getting a detailed map to teach for retention now.  I’m becoming BrainSMART!


Visit the BrainSMART website at http://www.brainsmart.org
Enhanced by Zemanta

Tuesday, October 5, 2010

"Never Question Ability, Always Improve Strategy"

“Never question ability, always improve strategy.”  That is my favorite quote from the book: BrainSMART 60 Strategies for Boosting Test Scores.  I received this book as part of the BrainSMART Masters Degree program (through Nova Southeastern University), but I noticed it is also available through Amazon… so just had to share!!

BrainSMART 60 Strategies for Boosting Test Scores (by Marcus Conyers and Donna Wilson), provides a wealth (60 to be exact) of research based strategies which can immediately be implemented in your classroom.  However, rather than just throwing a bunch of ideas at us, Conyers and Wilson present a research based foundation for the strategies they suggest. 

Take a look at the chapter titles:
  1. BrainSMART Student Achievement
  2. Ten Key Facts About Your Brilliant Brain
  3. The SMART Model™; The Synergy of Neuroscience and Common Sense
  4. State: The Power to Produce Results
  5. Meaning: How to Make Learning Meaningful in Your Classroom
  6. Attention: How to Gain and Sustain Focused Attention on the Real Work of Learning.
  7. Retention: Teaching with Memory in Mind
  8. Helping Students Transfer Learning from the Classroom to Success on the Test and in Life
  9. Sixty BrainSMART Strategies and Your Own BrainSMART Lesson Planning Guide
Conyers and Wilson provide the BrainSMART acronym which stands for State, Meaning, Attention, Retention, and Transfer.  These are the five components of the BrainSMART model which are fully explained in the book.  Each component has a full section of tools to help transfer that research model into success in the classroom.

You will honestly be thrilled with this book.  I’ve been greedily hoarding mine in my classroom, but I guess I’m going to have to start sharing soon.  I’ve been getting such great results by using the ideas, it would just be WRONG of me to keep it to myself!

So now I have done my good deed for the day…  the resource has been shared.   If you get the book, please let me know which strategies you like best!

Monday, October 4, 2010

Metacognition Lesson was a HUGE Success!

“I’m sorry, but we have to stop for recess,” I explained.  The response from my students was a resounding, “AWWWWWW, can’t we finish this first?!”  Wow, what a great thing to hear from 2nd graders!

The Lesson

My last post was about my idea for this lesson.  The lesson began with a review of what students already know about how the brain learns and remembers.  I reminded them how the brain is able to remember more when it can ‘tie’ the new information to existing knowledge.  After using arms, hands, and fingers to explain neurons, axons, and dendrites, (as demonstrated on a DVD by Dr. Donna Wilson of the BrainSMART program). I then whipped out the pipe cleaners for the hands-on demonstration.


Pipe Cleaners

I gave each student 3 pipe cleaners to twist together for the axons. Their little fingers diligently twisted away in anticipation of the project to come.  I reminded them to leave the ends untwisted to represent the dendrites.  Thus set, we gleefully proceeded to build our structure.

Putting it all Together

We began by saying the name of our town.   Our first axon was labeled “Our Town.”  Then each student was able to contribute something to build onto our expanding structure of ‘neural pathways.’  Every student added an axon to the structure.  It went something like this:
Our Town, Our School, Peach Orchard, Buffalo, Oklahoma
Oklahoma, Native Americans, Buffalo, USA, World
USA, North American Continent, Eagle
North American Continent, South America
South America, Rainforest, Amazon, Animals
Amazon, Nile, Egypt, World
Rainforest, Frogs
Frogs, Bullfrog

Success!

Soon we had an excellent visual representation of neural pathways established so far this year.  Several pathways to any subject are evident.  Students are very excited at the prospect of adding to our brain ‘structure’ throughout the year.


Location, Location

Finally we had to decide where to locate our structure of ‘neural pathways’ in the classroom.  One student thought it would be a good idea to place the structure near the goal banners they created at the beginning of the year.  What a fantastic idea!  The structure is now suspended low from the ceiling within easy reach of students... right below the students' goals.

Finally

I can’t express the success of this lesson enough.  If you’re looking for a way to teach metacognition, give pipe cleaners a try!

Saturday, October 2, 2010

Helping Young Students Understand Metacognition

Recreated :File:Neuron-no labels2.png in Inksc...Image via Wikipedia
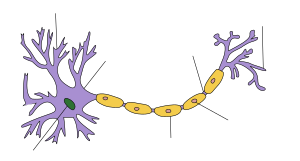
I got a bright idea today! (My partner-teacher always gets nervous when I say that.) I was thinking about metacognition and how to make that concept concrete for my 2nd graders.  The corresponding bright idea came while watching one of my BrainSMART videos.  The presenter, Dr. Donna Wilson, was teaching a 2nd grade class about memory.  She taught about axons and dendrites through the use of pipe cleaners.  The class was clearly engaged and excited.  They made axons by twisting three pipe-cleaners together about 2/3 of the way up, the remaining 1/3 represented the dendrites.  It was obvious the students could understand how memories connected together.  They also loved the kinesthetic examples.

My Zing Moment

The students were further excited at the prospect of connecting their newly made ‘dendrites’ and ‘axons’ together.  Then ZING, it hit me!  I could extend that lesson throughout the year.  There will be a twofold benefit.  First, students will have a concrete example of their growing memory.  Second, the example will serve as a concrete tool to review content and make meaningful connections with new content.

The Plan

Here’s my plan.  I will review the brain with students.  We will discuss how learning occurs better when tied in with existing knowledge.  Then it will happen.  I’ll dramatically whip out those pipe cleaners!  Students will make their axons and dendrites while we discuss things they already know and the connections to information learned so far this year.  When we find a connection… we’ll connect a dendrite to an axon with an informational label (ie: Ancient Civilizations.  Last year we learned about the ancient civilization of Egypt, this year we learned about the ancient civilization of Greece. Label 1: Ancient Egypt, Label 2: Ancient Greece). Soon we will have a nice structure to build on for the rest of the year. 

Throughout the Year

When introducing new content, I plan on returning to our model to see where our new information can connect with what we already know, and then label it appropriately.   We will also discover places to lay down completely new branches.  Therefore, we will be reviewing and creating pre-existing knowledge, and providing the tie-in to new learning… with a visual and kinesthetic model.  I love it.  I’ll fill you in on how it goes.

Finally

I will breeze into school Monday morning carrying three packages of colorful pipe-cleaners.  Now if I can just keep it out of the shaving cream…    
Enhanced by Zemanta

Sunday, September 26, 2010

Give Respect, Get Respect

“Why do you say ‘yes ma’am’ and ‘yes sir’ to us?”  The student looked puzzled as she asked me the question.  Several interested faces turned toward me, curiosity knitting their brows.  I smiled warmly and answered, “I do that to show you respect, just like you show me respect.  I can’t expect you to show me genuine respect if I don’t treat you respectfully in return.”  The students considered the comment for a moment, and then nodded in agreement. 

It all begins the first day of school.  I teach my students to answer questions by standing up, addressing me (or whoever is teaching) by name, and giving their answer in a complete sentence.  This helps build a respectful atmosphere in the classroom.  It also gets students in the habit of speaking in complete sentences, which then transfers (hopefully) into writing in complete sentences.  Everyone benefits. 

I want to point out that I do not demand that students stand, nor do I belittle those who forget.  If students are forgetting to answer properly, I simply wait for one to remember and then send that student to the ‘treasure chest’.  (Sometimes I’ll even send the next few to the pencil jar for good measure.) There are those who are always looking for a way to the treasure chest… and they NEVER forget.  Once that first student remembers, the rest will follow suit without being told.  After a few weeks, students rarely forget.

I do realize there are teachers who demand respect from their students without showing respect in return.  However, I don’t believe we can create a safe and secure learning environment without an atmosphere of mutual respect.  I want my students to feel secure enough to take chances, make guesses, and yes… even make mistakes.  Meaningful learning cannot take place if students are afraid of the teacher! 

Now my students are beginning to say, “Yes ma’am” and “No ma’am” to me.  I didn’t ask them to do that.  I simply modeled the behavior.   Since kids tend to do what we do rather than what we say, doesn’t it make sense to show your students respect as well?  Wouldn’t you rather a student ask you, “Why do you say ‘yes ma’am’ to me?” instead of, “Why are you so mean?”  Show your students respect if you would like genuine respect in return.  Your classroom will be a better place!

Protected by Copyscape Unique Content Checker


Note: Another site has been regularly plagiarizing my blog.  If you see this post on a website other than http://www.fortheloveofteaching.net, please comment to let me know.
Enhanced by Zemanta